Skip to main content
How to set up forwarding for all incoming messages in Google Apps
- Sign into your SBCS Google Apps account.
- Click on the Settings Gear at the top of the Google Mail page underneath your email address.
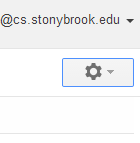
- Select Settings from the dropdown menu
- Click the Forwarding and POP/IMAP tab.
- In the Forwarding section, select Add Forwarding Address.
- Type in the Email Address you wish to forward all of your incoming mail to.
- Confirm the address and select Proceed.
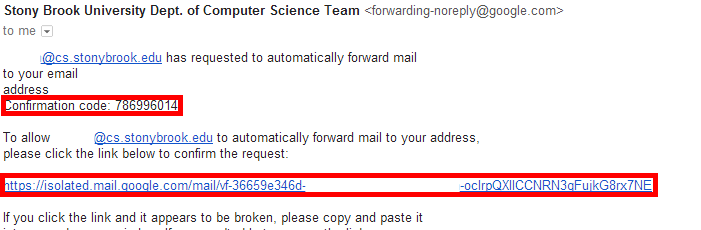
- Check the inbox of the address you wish to forward to for a confirmation email.
- Verify the address by either:
- Copying the confirmation code from the confirmation email and pasting it into the settings page of your Computer Science account.

- Clicking the link provided in the confirmation email.
- Enable forwarding in settings and determine what to do with the original messages that were sent to your Google Apps account email address.

- Select Save Changes at the bottom of the page.